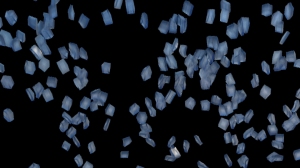
One of the shots required glass to go flying up in front of Professor X. It took me a while to figure out how I was going to do this. What I eventually decided on was using the emitter object in Cinema 4D. I haven’t really fiddled around with most of the options in it, as I generally just need to change the speed and lifetime of particles. First, I created an emitter and imported a 1×1 flat lego block. I then turned the emitter so that it was pointed directly upwards. For the 1×1 brick, I added a rigid body tag and then placed as a child of the emitter. Under the emitter’s particle settings, I ramped up the speed and changed the speed variation to 100%. Then, under the emitter’s emitter settings, I increased the x-size to fit to the edges of the camera’s view. I also changed the horizontal angle to 90 degrees, which cause the particles to travel 45 degrees in either direction from the origin. Finally, a texture was needed before rendering, so I applied a simple glass texture (transparent with refractive index of about 1.52).
The glass in the shot flies by extremely quickly and because of this, it has visible motion blur. This gave me two options; I could either add a blur in After Effects or directly in Cinema 4D. I chose the latter to get variation based on the object’s speed. To do this, I changed the renderer from standard to physical and checked the motion blur box. Then, under the camera’s settings, under the physical tab, I changed the shutter speed to 1/125, this value can be raised (less blur) or lowered (more motion blur) to change the amount of blur. I then rendered it out as .tif’s with a straight alpha channel. Here is the result:
All that was left was putting this into the shot. I imported the files into After Effects, dragged it into my composition and reduced the transparency:

